Blogs

handheld thermal monocular
Blogs

Handheld thermal monocular blog 

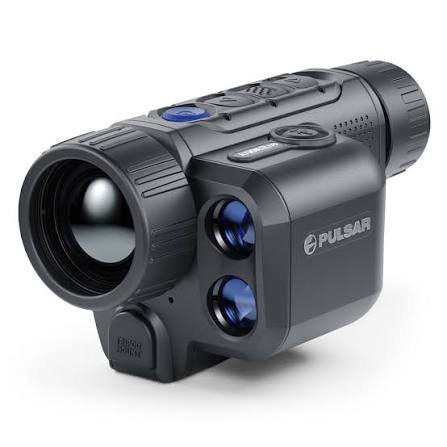
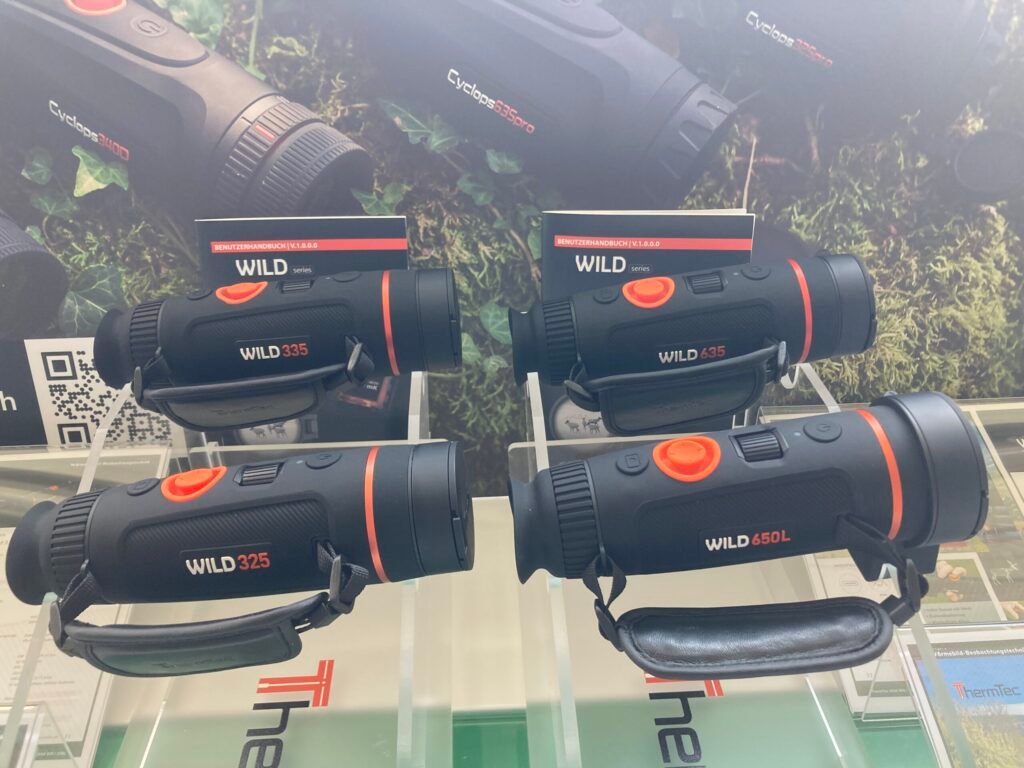
Handheld Thermal Monocular: Buyer’s Guide (2026) A handheld thermal monocular is a one-handed, single-eyepiece device that shows you heat instead of light, so you can find animals and people in complete darkness without a torch and without mounting anything to a rifle. It is the most practical thermal format, and for most buyers it should be their first thermal device. This guide focuses on what makes a handheld device particularly effective to actually hold and use: weight, balance, one-handed controls, battery format and pocketability, alongside the sensor specifications. For the wider category overview, see our complete thermal monocular guide, or browse the thermal monocular range. Why does the handheld format outperform all other thermal formats? Thermal comes as handhelds, binoculars, riflescopes and clip-ons. The handheld wins on four counts that matter to most people. It is the only format that is safe to search with. A rifle-mounted thermal device means pointing a firearm at everything you want to identify. A handheld thermal monocular lets you sweep ground, find a heat signature and work out what it is with no weapon involved. It is the cheapest way into thermal imaging. Entry devices start around €329, against roughly €1,490 for a clip-on, €1,690 for a scope and €2,990 for a binocular. It is the most versatile. The same device works for hunting, checking livestock, finding a lost dog, watching wildlife, inspecting a building for heat loss, and searching a garden at 2am. It goes in a pocket. The lightest units weigh around 255 g and genuinely fit in a jacket pocket, so you can carry them and use them. The trade-offs are real too. One eye tire over a long session, a handheld occupies a hand you may need, and it will not appear on any screen. If you glass for hours at a time, consider comparing it to a thermal binocular. What makes a good handheld: the physical specifications Most buying guides jump straight to sensors. For a device you hold one-handed for hours in the cold, the physical side deserves equal weight. Weight The practical range runs from about 255g to over 650g, and you notice every gram after an hour. Weight is the specification most often ignored at the point of purchase and most often complained about afterwards. Size and pocketability A portable thermal monocular you leave in the truck is worth nothing. Compact models around 150mm long can slide into a jacket pocket. Long-lens models do not fit in a pocket and need a case or a harness. Be honest about how you will carry it. Most people who buy the biggest lens end up carrying it less. One-handed operation Check that the buttons fall under your fingers without changing grip. Reviewers have criticised more than one popular compact for controls that are awkward to reach depending on hand size, and it matters more than it sounds when you are holding a device, a lead and a torch in the cold. Look for a small number of clearly separated buttons rather than a dense cluster. Battery format This is the most underrated specification on any handheld thermal imaging monocular. Runtimes range from about 6 to 20 hours. A 20-hour device with a sealed battery is fine; a 7-hour device with a sealed battery is a genuine limitation. Building and sealing Magnesium alloy housings are standard at mid-range and above, and they survive drops onto wet grass and stones. Look for IP67 or IPX7, both of which mean rain and brief immersion are not a problem. Consider that you will use this device in the worst weather of the year, at night, probably while fatigued. The sensor specifications that matter Thermal sensitivity (NETD) If you read one number, read this one. NETD measures the smallest temperature difference the sensor can separate from its noise, in millikelvins, and the lower is better. On a wet night, a soaked animal may be only slightly warmer than the soaked ground. Sensitivity is what sets them apart. Resolution sells devices; sensitivity finds animals. Resolution 256×192 for close work and garden checks. 384×288 for general hunting at practical ranges. 640×512 for open country and earlier identification. See our explainer on 384 versus 640 sensors. Lens and field of view Short lenses (19-25mm) give a wide view for fast scanning. A 35mm lens is the all-rounder’s compromise. A 50mm lens reaches furthest with the narrowest view. Finding a moving animal through a narrow field is genuinely harder, so do not automatically choose the largest lens. Detection versus identification range Quoted detection figures assume a large, warm target in clear cold conditions. Identification, which means you know what the animal is, occurs at roughly a quarter to a third of that distance, and weather affects both detection and identification. Use the figures to compare devices, but never treat them as a promise. Our guide on how far thermal really sees covers these points. Display A superb sensor behind a small, low-resolution screen is wasted. Check display resolution alongside sensor resolution, since this is a known weak point on some otherwise excellent compacts. Best handheld thermal monocular: our picks We stock every brand below and have no incentive to favor one. Category Pick Sensor NETD Weight Price Best overall value ThermTec Cyclone 640×512 <20 mK 255 g €899 Best on a budget HIKMICRO Lynx 3.0 256 / 384 Varies Light From €329 Best all-rounder ThermTec Cyclops 3.0 640×512 ≤25 mK Mid €1,190-1,390 Best image quality ThermTec Wild Pro 640×512 <15 mK 653 g €2,890 Best build and software Pulsar Telos LRF XP50 640×480 <18 mK Full size POA Most pocketable Pulsar Axion XQ19 384×288 Low ~270 g POA Best dual field of view ThermTec Cyclops-D 640×512 ≤25 mK Mid €1,890 Longest warranty AGM Sidewinder 384 12 µm ≤20 mK Mid POA Why the Cyclone leads on value It has a 640 sensor, operates at under 20mK, weighs 255g, offers roughly 20 hours of battery life, and costs €899. Two years ago, that specification cost twice as
agm thermal monocular
Blogs

Agm thermal monocular blog 

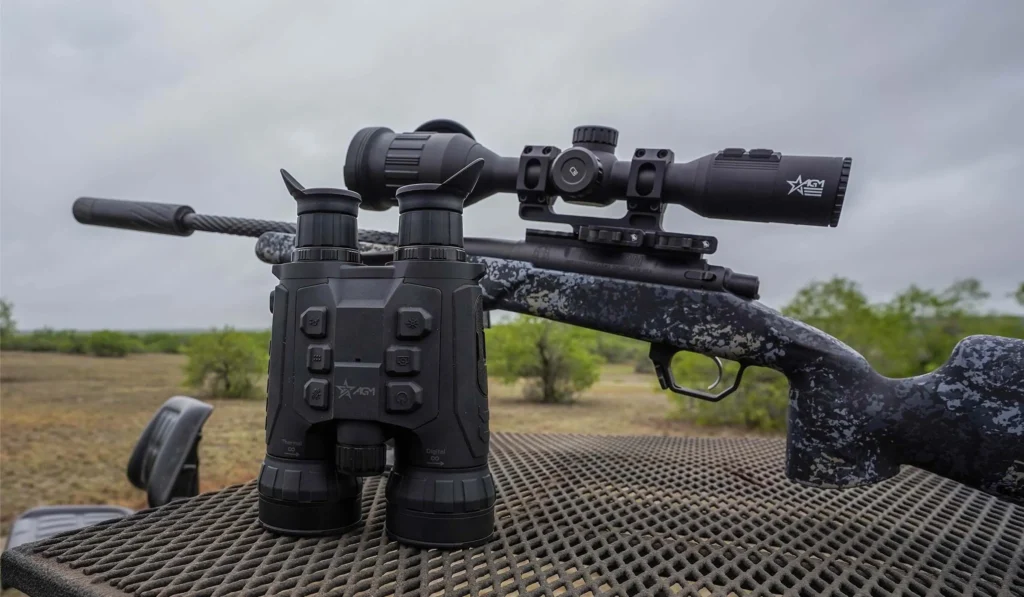
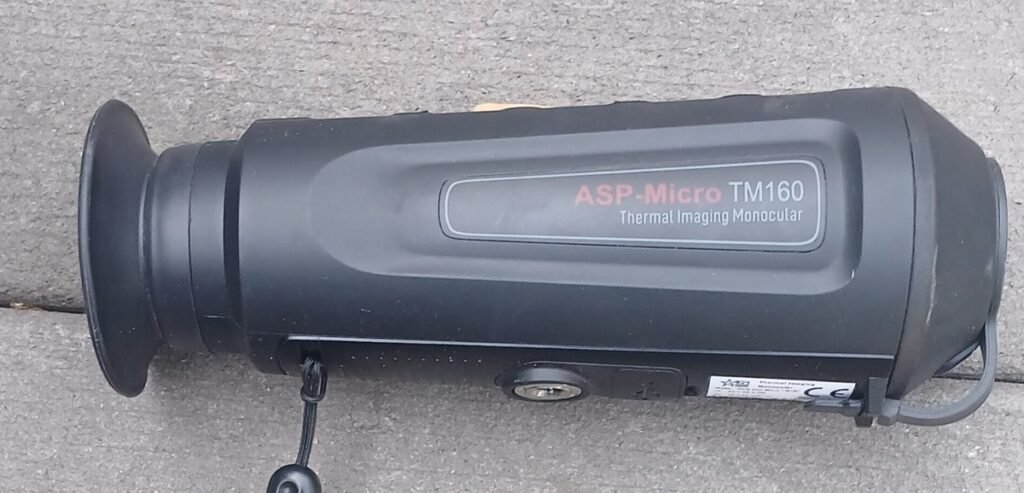
AGM Thermal Monocular: Every Model Compared (2026) An AGM thermal monocular is a handheld heat-imaging device from AGM Global Vision, the American manufacturer that has done more than anyone to push thermal prices down since 2019. AGM builds the widest handheld range of any brand we carry and backs it with a five-year transferable warranty, the longest in the category. This guide compares every current AGM thermal monocular, explains the naming, and is honest about which models are worth buying and which have been superseded. We stock AGM alongside Pulsar, ThermTec, HIKMICRO, and ATN, so we have no reason to oversell it. Browse the AGM range or the full thermal monocular category. Why AGM matters in thermal AGM Global Vision entered the market properly in 2019 and made a substantial impression at SHOT Show 2020. The timing was ideal: FLIR withdrew from consumer hunting sales in January 2020, leaving a gap just as AGM arrived with aggressive pricing. Three things define the brand. Price pressure. AGM’s Rattler and Taipan lines put usable thermal into the hands of buyers who previously could not afford it. Much of the price drop across the entire category over the past five years can be traced back to that competition. A five-year transferable warranty. The longest anyone offers and transferable to a second owner. On a device costing well over a thousand euros, that is worth real money, and it supports resale value. Range breadth. AGM makes handhelds, clip-ons, riflescopes, and fusion devices across almost every price point. The weakness is the consistency of generation. AGM iterates quickly, and older models sit on shelves next to current ones at similar prices with meaningfully different specifications. That trips up more buyers than anything else about the brand. Decoding AGM model names Element Meaning Asp Older observational handheld line, 17µm sensors Taipan / Taipan V2 Compact affordable handheld line, 12µm Sidewinder Premium handheld line, best sensitivity Seeker Handheld observational line Fuzion / Fusion Thermal blended with a visible channel Rattler Clip-on and riflescope line, not handheld TM Thermal monocular First number Objective lens in millimetres, e.g. 19, 25, 35, 50 Second number Sensor resolution, e.g. 256, 320, 384, 640 LRF Built-in laser rangefinder V2 Second generation So an AGM Sidewinder TM35-640 is a premium handheld with a 35mm lens and a 640 sensor. A Taipan V2 19-384 is a second-generation compact with a 19mm lens and a 384 sensor. That naming is genuinely more logical than most of the industry’s, once you know the pattern. The AGM thermal monocular range compared Model Sensor Pixel pitch NETD Lens Notes Sidewinder TM25-384 384×288 12µm ≤20 mK 25 mm Premium, 64 GB, IP67, 50 Hz Sidewinder TM35-384 384×288 12µm ≤20 mK 35 mm Best sensitivity in the range Sidewinder TM35-640 640×512 12µm ≤20 mK 35 mm High-resolution premium Sidewinder TM50-640 640×512 12µm ≤20 mK 50 mm Longest reach Taipan V2 19-384 384×288 12µm Sub-20 to 35 mK 19 mm Wide field, removable 18650 Taipan V2 25-384 384×288 12µm Sub-20 to 35 mK 25 mm Detection to ~1,250 m Taipan V2 10-256 256×192 12µm 10 mm Entry, very wide field Asp TM35-384 384×288 17µm <35 mK 35 mm F1.0 Older generation, 2.4x Seeker 19-384 384×288 19 mm Observational Fuzion LRF TM35-384 384×288 12µm 35 mm Fusion imaging plus LRF AGM Sidewinder: the one to look at The Sidewinder is AGM’s premium handheld and the model that changed how we think about the brand. A 12 µm detector at NETD ≤ 20 mK is genuinely competitive with anything at the price, paired with a 1024×768 OLED display, 64 GB of internal memory, a 50 Hz refresh rate, and IP67 sealing. Digital zoom runs 1x, 2x, 4x, and 8x, and the AGM Connect app handles sharing and control. Sub-20mK is the specification that matters. It means the Sidewinder holds a usable image in fog, drizzle, and humidity, which is where cheaper devices collapse. Against a Pulsar Axion 2 XG35 at under 40 mK, the Sidewinder is the more sensitive device despite costing less. If you buy one AGM thermal monocular, buy a Sidewinder. AGM Taipan V2: the value pick The Taipan V2 is the affordable compact, built around a 12µm 384×288 sensor with detection to roughly 1,250 m. AGM describes the series as offering some of the best image quality the company has produced. Two practical upgrades over the original Taipan matter. First, a removable 18650 battery, which uses a cheap standard cell available anywhere rather than a proprietary pack. Second, a 90-degree tilt sensor that automatically blanks the display when the device is lowered, which meaningfully extends runtime in real use. Sensitivity varies by variant between roughly sub-20mK and sub-35mK, so check the specific model rather than assuming. The 19mm version gives a wide field for close, brushy ground; the 25mm reaches further. AGM Asp: superseded, but still sold The Asp TM35-384 runs an older 17µm sensor at under 35mK behind a 35mm F1.0 lens, with 2.4x base magnification, a 1024×768 OLED display, and detection to roughly 780m. It was a decent device when it launched, and it still produces a usable image in cold, dry conditions. It has been superseded. If an Asp and a Taipan V2 or Sidewinder are similarly priced, buy the newer one. The sensitivity difference is not marginal. AGM Fuzion: thermal plus visible Fuzion models blend a thermal channel with a visible-light channel into a single fused image rather than making you switch between them. For identification work that is genuinely useful, because thermal tells you something is there, and the visible channel helps tell you what. It is AGM’s clearest technical differentiator. Our thermal binocular guide covers the wider multi-spectrum and fusion category. AGM versus the competition Model Sensor NETD Standout Warranty AGM Sidewinder TM35-384 384 12µm ≤20 mK 64 GB, IP67, value 5 years AGM Taipan V2 25-384 384 12µm 20-35 mK 18650 cell, tilt sensor 5 years ThermTec Cyclone 640 12µm <20 mK 255 g, 20 h, €899 Manufacturer ThermTec Wild Pro 640

Blogs

Faq page

Frequently Asked Questions Answers to the questions we are asked most, grouped by topic. If your question is not here, contact us via our contact page, and a person who knows thermal optics will reply, usually within [1 business day]. Ordering and payment Shipping and delivery Returns and refunds Warranty Legality and eligibility Choosing a device I am new to thermal. What should I buy first? A thermal monocular, almost always. It finds and identifies games or subjects; it is the safest way to search because nothing is mounted on a rifle, and it is the most versatile and affordable format. Start with our complete thermal monocular guide, then the beginner’s guide to thermal imaging for hunting. What is the difference between a monocular, a scope, a clip-on and binoculars? A monocular finds and identifies. A scope takes the shot. A clip-on converts an existing day scope to night use. Binoculars are best for long observations with both eyes. Our guide comparing a monocular, scope and clip-on explains which to buy for what. Which is the single most important specification? Sensitivity, measured as NETD in millikelvins, more often than resolution. Lower NETD holds a cleaner image in fog, drizzle, and humidity, which is when most people actually need thermal. Resolution matters too, and our guide on 384 versus 640 sensors explains the balance. Should I choose thermal or night vision? For finding warm animals in the dark, thermal wins clearly, because it needs no light and is not defeated by cover. Traditional night vision is better for identifying fine detail where some light exists. Our full comparison of thermal versus night vision covers the choice. How far will a thermal device actually let me see? Detection ranges quoted by manufacturers assume large, warm targets in good conditions, and identification happens much closer than detection. Our guide on how far a thermal monocular really sees sets realistic expectations. Which brand should I choose? We stock several because none wins outright. In brief: Pulsar for build and software, ThermTec for specification per euro, AGM for warranty and value, HIKMICRO for the widest price range, ATN for features. Our brand guides compare each in detail: Pulsar, AGM and ATN. What can I get on a tight budget? Genuine, usable thermal now starts around [€329]. Our budget thermal monocular guide explains what each price band buys and where cheap stops being worth it. Can you please just recommend something for me? Yes, and we would rather do that than have you buy the wrong thing. Message us through our contact page with where you are, what you hunt or observe, your typical distances and your budget, and we will shortlist across every brand we carry. Using your device About BlackReckon Still stuck? Reach us through our contact page and a person who uses these devices will help. Or dive into the guides: the complete thermal monocular guide, thermal imaging for hunting, thermal scopes, clip-ons, binoculars, and marine cameras.

handheld thermal monocular
Blogs

Thermal Monocular

Thermal Monocular: The Complete Buying Guide (2026) A thermal monocular is a handheld device that sees body heat instead of light, so it finds animals and people in complete darkness, through fog, and in thick cover where your eyes and a torch show you nothing. It is the single most useful piece of night equipment most hunters, land managers, and outdoor professionals will ever buy, and it is the device we recommend people buy first. This guide covers everything: how a thermal monocular works, the specifications that matter and the ones that do not, what you should expect to pay, and an honest comparison of every major brand we carry. We sell all of them, so we have no reason to push one. Jump to the thermal monoculars for sale whenever you want current stock and euro prices. What is a thermal monocular? A thermal monocular, also sold as a thermal imaging monocular or a thermal vision monocular, is a single-eyepiece handheld device. You hold it up, look through it, and see a picture built from heat rather than light. Everything warmer than absolute zero gives off infrared radiation. A living animal runs considerably warmer than the grass, soil, and trees around it, and a thermal camera reads that difference and turns it into a visible image. A deer standing motionless in a hedge is invisible to your eye at night. On thermal, it appears as a bright shape that you cannot miss. The word “monocular” simply means one eyepiece, rather than binoculars with two. That keeps a thermal monocular small, light, and affordable compared with every other kind of thermal device. Three things it is not, however. It is not night vision, which amplifies existing light and needs some to work with. It is not a rifle sight and should never be used as one. And it is not an X-ray: thermal cannot see through walls, glass, or dense foliage, only through the gaps in cover where heat escapes. How a thermal monocular works Understanding the basics makes every specification below make sense. The sensor. At the heart of every thermal imaging monocular sits a microbolometer, a grid of tiny elements that each change electrical resistance when infrared energy lands on them. The device measures those changes thousands of times a second and builds an image. More elements in the grid means more detail, which is what “640×512” or “384×288” describes. Pixel pitch. This is the physical spacing between those elements, measured in micrometers. Modern sensors use 12µm; older ones use 17µm. A smaller pitch means more sensors packed into a smaller, cheaper lens, which is why 12 µm devices tend to be more compact for the same performance. The lens. Ordinary glass blocks infrared, so thermal lenses are made from germanium, a semiconducting metalloid that is transparent to the wavelengths thermal uses. Germanium is expensive, and it is the main reason a bigger lens costs so much more. The display. The processed image is shown on a small OLED or AMOLED screen inside the eyepiece. A superb sensor behind a poor display is wasted, which is why display resolution belongs in your comparison. Calibration. Thermal sensors drift as they warm up, so most devices periodically re-reference themselves. On older units you hear a click and the image freezes for a moment. Newer shutterless designs largely remove that interruption. Thermal monocular vs the alternatives This area is where most money gets wasted, so it is worth being precise. Thermal monocular Thermal binocular Thermal scope Thermal clip-on Night vision Job Find and identify Long observation Take the shot Convert a day scope See in low light Eyes used One Two One One One or two Rifle mounted No No Yes Yes Sometimes Works in zero light Yes Yes Yes Yes No Sees through fog Well Well Well Well Poorly Shows colour or detail No Some models No No Yes Typical price €329-2,900 €2,990-3,690 €1,690-3,690 €1,490-2,690 €200-2,000 Buy first? Yes If you glass for hours After a monocular If you own a day scope, Rarely, now Thermal monocular vs binocular A thermal binocular uses both eyes, which is much less tiring across a long session and gives a steadier, more natural image. It also costs two to three times as much and weighs more. If you scan in short bursts and move a lot, a monocular is the better tool. If you sit and watch the ground for hours, binoculars earn the difference. Thermal monocular vs scope A thermal scope mounts on a rifle and exists to aim. A monocular exists to search. The distinction is a safety rule, not a preference: scanning with a scope means pointing a loaded firearm at every warm object you want to identify, including dog walkers, livestock, and other hunters. Buy the monocular first, and use the rifle only once you know what you are looking at. Thermal monocular vs clip-on A thermal clip-on fits in front of an existing day scope and converts it for night use without re-zeroing. It is a shooting device, not a searching one, though several models double as handheld monoculars when removed. If you already own a day scope and you shoot well, a clip-on plus a cheap monocular is often better value than a dedicated thermal scope. Thermal monocular vs night vision Night vision amplifies the small amount of visible light around you. It shows recognizable detail, which thermal cannot, but it needs light to amplify and it is blinded by a torch or a headlight. Thermal needs nothing at all and cuts through haze. For finding warm animals in the dark, thermal wins decisively, which is why it has largely replaced night vision for hunting. Our guide on thermal versus night vision covers the full comparison. How to choose a thermal monocular Eight specifications decide whether you will be happy. They are listed in the order they affect your night, not in the order that manufacturers list them. 1. Sensor resolution On any thermal imaging monocular,

thermal binoculars for hunting
Blogs

Binocular buying guide

Thermal Binoculars for Hunting: How to Choose (Guide 2026) Thermal binoculars for hunting let you scan for the body heat of game using both eyes, which is markedly more comfortable and steadier than a single-eye monocular over a long night. The most advanced models go further still, adding a daytime color camera, a laser rangefinder, and infrared illumination so one device covers the full twenty-four hours. This guide explains when binoculars are worth the extra cost, what to look for, and how the ThermTec Ventus multi-spectrum range compares. New to thermal? Start with the complete guide to thermal imaging for hunting. Otherwise, browse the multi-spectrum binocular range, the Pulsar brand page, the Hikmicro brand page, the AGM Global Vision brand page, or the ThermTec brand page. Why choose thermal binoculars over a monocular A thermal monocular is lighter, cheaper, and, for many hunters, entirely sufficient. It is the right first thermal for most people, and nothing here changes that. Thermal binoculars for hunting earn their place when you glass for extended periods. Using both eyes removes the strain that builds up over a night of squinting through a single tube, and it produces a more natural, immersive image that your brain interprets faster. Add electronic image stabilization, and the picture holds steady at magnification, where a handheld monocular wanders. For land managers, professional observers, guides, and anyone spending hours behind glass rather than minutes, that difference is the whole argument. Thermal monocular Thermal binoculars Viewing One eye Both eyes Fatigue over hours Noticeable Much lower Stabilisation Rare Common on premium models Weight 255-650 g Heavier Day use No Yes, on multi-spectrum Typical price €899-2,890 €2,990-3,690 Best for Mobile scanning, first thermal Long sessions, observation, day and night The honest summary: if you scan in short bursts and move a lot, buy a monocular and spend the difference on a better sensor. If you sit and watch, buy binoculars. What “multi-spectrum” actually means The newest thermal binoculars for hunting are multi-spectrum, and the term deserves unpacking because it is used loosely. A thermal-only device reads infrared heat. It works in total darkness and shows nothing but temperature: no color, no texture, and no fine detail. A multispectral device combines that thermal channel with at least one other imaging channel, typically a high-resolution color camera that works in daylight and, with infrared illumination, in darkness too. The practical effect is that one device stops being a night-only tool. You glass in natural color during the day, switch to thermal after dark to find warm bodies in cover, and switch back to the optical channel with IR to confirm what you have found. For a hunter who currently carries binoculars by day and a thermal monocular by night, that consolidation is the selling point. How to choose thermal binoculars for hunting Sensor resolution and NETD Start here. Everything else on a pair of thermal binoculars for hunting is secondary to the sensor behind it. The two specifications that determine image quality are resolution and NETD. A 640×512 sensor provides the detail and identification range serious hunters need, while a 384 sensor keeps costs down but limits how far out you can confirm what you see. NETD, measured in millikelvins, describes the smallest temperature difference the sensor can resolve, and lower is better. Below 15mK is pro-grade and keeps a clean image in fog, drizzle, and humidity. On a premium device you use for hours, both are worth paying for. Our explainer on 384 versus 640 sensors covers the trade-off. Multi-spectrum day and night capability If you want one device rather than two, the multi-spectrum capability is the feature to insist on. A thermal-only binocular is a night tool. A multi-spectrum binocular with a 4K optical channel replaces your day glass as well, which changes the value calculation considerably. Lens size and detection range The thermal lens sets the detection range against the field of view. A 35 mm lens gives a wider view and roughly 1,800 m detection, suiting mixed terrain, bush, and mobile scanning. A 50 mm lens narrows the view and pushes detection to about 2,600 m in open country. Treat those figures as a way to compare devices, not as a promise. Identification happens far closer than detection, and weather cuts both, as our guide on how far thermal actually sees sets out. Rangefinder A built-in laser rangefinder measures the exact distance to whatever you are looking at, which helps you plan a stalk, judge whether a shot is on, and avoid the classic error of misjudging distance across open ground at night. On thermal binoculars with rangefinder capability, the measurement appears in the display without breaking your view. Stabilisation, ergonomics and battery Electronic stabilization steadies the image at magnification and is one of the clearest differences between a premium binocular and a basic one. Interpupillary adjustment and dioptre correction matter more here than on a monocular, because both eyes are involved. And check the battery format: replaceable cells let you swap batteries in the field, while a sealed internal battery does not. Thermal, night vision, or day binoculars? Three technologies are often confused, and they do different jobs. Day binoculars amplify nothing. They gather and focus available light, so they are superb in daylight and useless after full dark. Night vision amplifies the small amount of visible light present, producing an image closer to normal vision. It needs some light to work, so it fails on a genuinely black night under a cloud, and it is easily washed out by a vehicle headlight or a farmyard lamp. Thermal readers emit heat and need no light at all. It finds warm animals in total darkness and through light cover but shows heat and shape rather than color or fine detail. For finding game after dark, thermal wins clearly, which is why thermal binoculars for hunting have largely displaced night vision in the field. Our full comparison of thermal versus night vision covers the differences properly. A multi-spectrum binocular such

Blogs

thermal Pricing

How Much Does a Thermal Scope or Monocular Cost? (2026 Price Guide) A thermal scope costs from around €1,000 for an entry model to over €5,000 for a flagship with a built-in rangefinder, while thermal monoculars start from around €420. Most hunters spend between €1,500 and €3,000 for a capable device that lasts for years. What you pay comes down mainly to sensor resolution, thermal sensitivity, and whether the device includes a rangefinder, so this guide breaks down real prices and shows where your money goes. It sits within our complete guide to thermal imaging for hunting. The prices below are guide figures in euros and vary by model and stock availability. How much does a thermal scope cost? Thermal riflescopes are the most expensive thermal device because they combine a thermal core with a shooting-grade, recoil-rated sight. Here is the lie of the land. Budget What you get Example €1,000 to €2,000 Entry-level to mid-range 384 thermal scope AGM Rattler TS35-384 €2,000 to €3,500 Strong 384 or 640 scope, some with LRF Pulsar Thermion 2, ThermTec Ares €3,500 to €5,000 Flagship 640 or HD with rangefinder and ballistics Pulsar Thermion 2 LRF, ThermTec Ares 650 LRF €5,000+ Top HD long-range and multispectral HD and Duo models How much does a thermal monocular cost? Thermal monoculars are the most affordable way into thermal imaging because they are handheld scanners without a shooting-grade mount. Entry units start from around €420, mid-range 384 models sit between €1,000 and €2,000, and flagship 640 monoculars run from roughly €2,300 to €3,300. Budget What you get Example €400 to €900 Entry 160 or 256 monocular AGM Asp-Micro TM-160 (€423) €1,000 to €2,000 Capable 384 monocular AGM Taipan and Sidewinder 384 €2,000 to €3,300 640 monocular, some with LRF AGM Sidewinder TM50-640, Pulsar Telos See the range on the thermal monoculars page. What drives the price of a thermal device? Five things push the price up. Higher sensor resolution (640 costs more than 384, which costs more than 256) is the biggest factor. A lower NETD, meaning higher thermal sensitivity, adds cost. A longer, faster lens increases both reach and price. A built-in laser rangefinder and ballistic calculator add a clear premium. And extras like HD displays, higher-capacity recording, and a premium build all add up. Understanding this is why we always say spend on the sensor first; the reasoning is in 384 vs 640 thermal. Price by sensor resolution Sensor Monocular from Scope from 160 / 256 ~€420 Rare in scopes 384×288 ~€1,150 ~€1,000 to €2,000 640×512 ~€2,300 ~€2,300 to €4,000 HD 1024×768 Premium ~€4,000+ Are cheap thermal scopes worth it? A budget thermal device is worth it if you match your expectations to it. An entry-level 160 or 256 monocular is a genuinely useful scanner and recovery tool and a great first thermal. What disappoints is buying the cheapest option while expecting long-range identification, which needs a bigger sensor. Our honest advice is to buy the best sensor you can afford rather than the most magnification and to avoid unknown, unsupported brands where warranty and service are uncertain. How to get the best value Spend on resolution first, then the lens for your range, and treat digital zoom and extras as secondary. Buy from a retailer that handles the warranty and offers real support, so a fault does not leave you stranded. And consider a monocular first: it is the cheapest device that solves the hardest part of night hunting, which is finding game. If you want help matching a budget to a device, contact us. Frequently asked questions Hidden costs to budget for The device price is not the whole cost, so plan for a few extras. Spare batteries or a power bank keep you running through long nights. A scope needs a set of quality mounts or rings, and a clip-on requires a stable mount. Thermal zeroing targets, a durable case for transport, and a spare lens cloth are worth having. Firmware and app features are usually free, but consider the value of buying from a retailer that handles the warranty and offers support, as a repair or service turnaround can incur real costs if you have to deal with a manufacturer overseas. Contact Blackreckon for inquiries. Quick facts: thermal scope and monocular cost Thermal monocular from ~€420 Thermal scope from ~€1,000 Typical hunter spend €1,500 to €3,000 Flagship with LRF €3,500 to €5,000+ Biggest price driver Sensor resolution Best value tip Buy sensor first, not the magnification.

Blogs

Thermal clip-on vs scope

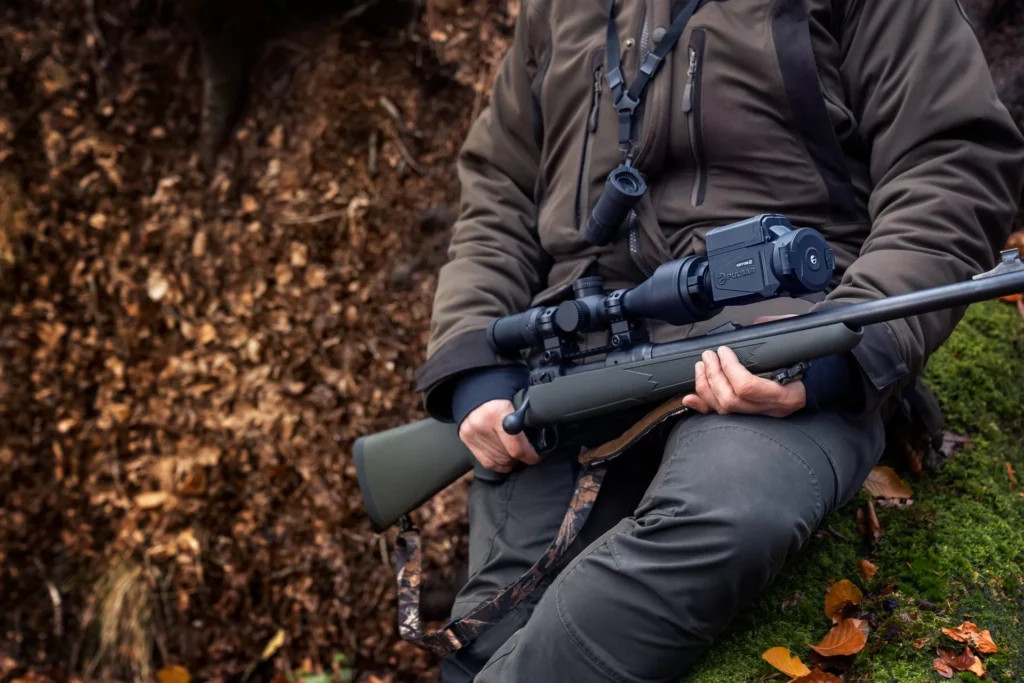
Thermal Clip-On vs Dedicated Thermal Scope A thermal clip-on mounts in front of your existing day scope and keeps its zero, so one rifle works day and night, while a dedicated thermal scope replaces your day optic and gives a slightly cleaner, more integrated night image. Choose a clip-on for flexibility on a single rifle and a dedicated scope for the best dedicated night setup. The thermal clip-on vs scope decision really comes down to whether you want one versatile rifle or a rifle built for the dark. This guide is part of our complete guide to thermal imaging for hunting, and follows from thermal monocular vs scope vs clip-on. Thermal clip-on vs scope: the quick answer Factor Thermal clip-on Dedicated thermal scope How it mounts In front of your day’s scope Replaces your day scope Keeps day scope zero Yes N/A (own reticle and zero) Day and night on one rifle Yes No, night-focused Night image quality Very good, depends on the day’s scope. Cleanest, most integrated Weight and length Adds to the front of the rifle Self-contained Best for One flexible rifle A dedicated night rifle What is a thermal clip-on? A thermal clip-on is a thermal device that attaches in front of your normal day scope and turns it into a thermal sight. You keep looking through your day scope and its reticle so your existing zero stays intact, and you remove the clip-on for daytime in seconds. Some monocular-style units, such as the Pulsar Krypton 2, work both as a handheld spotter and as a front clip-on, which adds even more flexibility. The appeal is simple: one rifle, one zero, day and night. What is a dedicated thermal scope? A dedicated thermal riflescope replaces your day scope entirely and carries its own thermal reticle and zero. You aim and shoot through thermal directly, with the sight built as one complete system, which tends to give the cleanest image and the most features, including built-in rangefinders on models like the Pulsar Thermion 2 LRF. The trade is that the rifle is now set up for night work, so you either swap scopes for daytime or keep a separate day-time rifle. Browse options on the thermal riflescopes page. Pros and cons of each A clip-on wins in flexibility. You keep your familiar day scope and zero, convert one rifle for night use, and avoid buying a second optic setup. It can cost less overall if you already own a good day scope. The downsides are added length and weight at the front and a night image that depends partly on the quality of the day scope behind it. A dedicated scope wins on image quality and integration. It usually gives the cleanest, most detailed night picture, the most built-in features, and a purpose-built reticle. The downside is that it commits the rifle to night use, and you lose your day scope on that rifle unless you swap optics. Which should you choose? Choose a clip-on if you hunt both day and night with one rifle, already own a day scope you trust, and value flexibility. Choose a dedicated scope if you want the best possible night image, hunt mostly at night, or want built-in ranging and ballistics on a rifle set up for the dark. Many experienced hunters end up with both over time, using a clip-on on a general rifle and a dedicated scope on a night rifle. Do thermal clip-ons keep your zero? Yes, a quality clip-on on a stable, repeatable mount preserves your day scope’s zero because you still aim through your normal reticle. The clip-on simply feeds a thermal image into the front of the day scope. Poor alignment or a flimsy mount can shift your point of impact, so the mount and correct fitting matter. Many hunters move a single clip-on between rifles once they have confirmed it holds zero. Frequently asked questions (FAQ) Quick facts: thermal clip-on vs scope Clip-on mounts In front of your day scope, keeps zero Scope mounts Replaces the day scope, own zero Clip-on best for One rifle, day and night Scope best for A dedicated night rifle, best image Both need A handheld spotter to find game

Blogs

384 vs 640 Thermal

384 vs 640 Thermal: Is the Upgrade Worth the Money? A 640 thermal sensor shows more detail and identifies game at greater distances than a 384, but it costs significantly more. For most European hunting, a 384 is enough and the better value, while a 640 earns its price only if you hunt open ground at long range or need to identify targets far away. The 384 vs 640 thermal decision is really a question of how far you hunt and how much detail you need at distance. This guide explains the real difference, when each makes sense, and what they cost. For the bigger picture, see our complete guide to thermal imaging for hunting. 384 vs 640 thermal: What is the real difference? The numbers refer to the thermal sensor’s pixel count: a 384 sensor is 384×288 pixels, and a 640 sensor is 640×512. A 640 has more than twice the pixels of a 384, so it packs more detail into the same image. That extra detail does two things: it makes the picture look sharper, and it lets you identify what an animal is at a greater distance, because more pixels fall on the target. For the full-resolution ladder, see thermal sensor resolution explained. 384 vs 640 compared Factor 384×288 640×512 Pixel count 110,592 327,680 Image detail Good Noticeably sharper Identification range Strong at typical hunting distances Better at long range Field of view (same lens) Narrower Wider Best use All-round night hunting Long range and open ground Typical price From around €1,150 From around €2,300 One detail many buyers miss: at the same focal length, a 640 sensor gives a wider field of view than a 384, because the larger sensor captures more of the scene. That makes 640 units easier to scan with as well as sharper. When 384 is enough (and saves you money) A 384 sensor is enough for most hunting in Europe, and choosing it over a 640 can save you €1,000 or more. At the ranges most boar, fox, and deer are detected and shot; a 384 detects and identifies game well. If you hunt woodland, field edges, and mixed ground out to a few hundred meters, a good 384, such as the AGM Sidewinder TM35-384, with its sub-20 mK sensor, gives you a clean, capable image without paying for reach you will rarely use. Put the money you save toward a better lens or a spare battery instead. When 640 is worth it A 640 sensor is worth the extra cost when you hunt open ground at long range or when identifying a target at a distance matters. On an open hill, in large fields, or when foxing across stubble, the extra detail of a 640 lets you identify what an animal is much further out, which can make the difference between a confident shot and a wasted stalk. If you regularly work beyond a few hundred meters or simply want the sharpest image available, a 640 like the AGM Sidewinder TM35-640 or the ThermTec Ares 650 LRF is worth the expense. Compare them in the thermal monoculars range. Does a 640 detect further than a 384? Not necessarily for raw detection, because the lens drives detection range as much as the sensor. A 384 with a long 50 mm lens can detect heat as far as a 640 with a shorter lens. The 640 excels in identification, as it clearly indicates the heat source at a greater distance by resolving more detail. So if your goal is spotting heat far away, lens matters most; if your goal is identifying it far away, the 640 sensor matters most. We explain detection versus identification in how far can a thermal monocular see. 384 vs 640 by price Here is how the two sit in the catalogue, using comparable models so the gap is clear. Model Sensor Lens Price AGM Taipan TM15-384 384×288 15 mm €1,156 AGM Sidewinder TM35-384 384×288 35 mm €1,958 AGM Sidewinder TM35-640 640×512 35 mm €2,315 AGM Sidewinder TM50-640 640×512 50 mm €2,918 Comparing the two Sidewinder TM35 models, which share the same 35 mm lens, the step from 384 to 640 costs around €357. That is the clearest way to see what the resolution upgrade alone is worth. Frequently asked questions Resolution or NETD: Which matters more? Both matter, but they do different jobs. Resolution drives how much detail you see and how far you can identify game, while NETD drives how cleanly a warm target separates from its background, especially in damp or low-contrast conditions. A 384 with a low sub-20 mK NETD can give a more usable image on a mild, wet night than a 640 with a higher NETD. Look at the two together rather than chasing pixel count alone. Quick facts: 384 vs 640 thermal 384 pixel count 384×288 (110,592 pixels) 640 pixel count 640×512 (327,680 pixels) 384 is best for All-round hunting, best value 640 is best for Long range and identification Detection range driver Mainly the lens, not the sensor Typical price gap (same lens) Around €350 to €600

best thermal scope for coyote hunting
Blogs

The Best Thermal Scope for Coyote Hunting

Best Thermal Scope for Coyote Hunting: 2026 Buyer’s Guide The best thermal scope for coyote hunting is one with a 384 or 640 sensor, thermal sensitivity below 20 mK, and enough magnification and range to identify a coyote across open ground at night. Coyotes are shot at distance, often on the move, and frequently against low-contrast winter backgrounds, so the scope that suits them is not always the one that suits close-cover hog hunting. This guide shows you how to choose the right one, with picks by budget and an honest comparison across every brand we carry. We stock them all, so unlike the manufacturer guides you will compare these models against; we have no reason to push one make. New to thermal entirely? Start with our complete guide to thermal imaging for hunting, or if you are still choosing a device type, read thermal monocular vs scope vs clip-on. Browse the full thermal riflescope range any time. Quick answer: best thermal scope for coyote hunting Short on time? Here is the shortlist. Now the full guide. Why coyote hunting demands a specific thermal scope Coyotes are one of the more demanding quads for a thermal scope, and understanding why helps you choose the right specs. They are shot at a distance. Unlike hogs, which often appear in or near cover at moderate range, coyotes are commonly called and shot across open fields and pastures, frequently out past 150 to 300 yards. That puts a premium on resolution and useful magnification, because you need to identify the animal and place a precise shot far out. They are often low-contrast. A coyote’s coat against frosted winter stubble or cold pasture can give a weaker heat signature than a hog’s bare skin against warm ground. That is precisely where thermal sensitivity (NETD) earns its keep: a sub-20 mK sensor separates a coyote from cold ground where a less sensitive scope shows a vague blur. They move, and they are wary. Called coyotes often come in fast, circle downwind, and rarely stand still for long. A smooth 50 Hz image and a scope you can get on target quickly matter more than they do for a stationary hog. They are frequently shot in cold weather. Coyote season peaks in winter, when cold, damp air and long sessions test both the sensor and the battery. Rugged build and real battery life matter. Put together, the best thermal scope for coyote hunting leans toward good resolution, low NETD, useful magnification for distance, and a rangefinder more than a close-cover hog scope does. What makes a great thermal scope for coyotes? A great coyote thermal scope gets five things right. Sensor resolution. The sensor resolution is 256, 384, or 640, and it determines how far you can identify a coyote rather than just detect heat. For coyotes at typical calling distances, a 384 sensor is the practical choice, and a 640 sensor is worth the extra cost on genuinely open ground. See 384 vs 640 thermal. Thermal sensitivity (NETD). Below 20 mK keeps the image clear in the damp, low-contrast winter conditions that coyote hunters most often face. This matters more for coyotes than for almost any other quarry. Detection and identification range. More on the honest math below, but you want enough real identification range for the distances you actually shoot, not the biggest advertised detection number. A smooth image and quick handling. A 50 Hz refresh rate keeps a moving, circling coyote sharp, and a scope you can get on target fast turns a passing shot into a taken one. It has a rugged, weatherproof build and a recoil rating that matches your caliber. It has to hold zero on your rifle and keep working through a cold, wet night. A built-in laser rangefinder and ballistic calculator, as on the Pulsar Thermion 2 LRF, turn a good coyote scope into a confident long-range tool, because knowing the exact distance to a coyote at 250 yards is the difference between a clean shot and a guess. Detection range vs. identification: the coyote truth Here is the thing every spec sheet glosses over, and it matters more for coyotes than most quarry. The advertised detection range is not how far you can tell it is a coyote. Detection means “something warm is there.” Identification, telling a coyote from a fox, a dog, or a deer, and placing an ethical shot, happens at roughly an eighth of the detection figure in the conservative reading, and cold, damp air shortens it further. Advertised detection Realistic recognition (~25%) Realistic identification (~12.5%) 1,800 m ~450 m ~225 m 2,400 m ~600 m ~300 m 2,600 m ~650 m ~325 m Since most coyotes are shot inside 300 yards, a scope with a genuine 2,000 m plus detection figure gives you a comfortable identification range for real coyote distances. Do not overpay for a detection number you will never use, and do not assume a big detection figure means a long identification range. Sensor resolution and NETD drive real identification distance. More on how far thermal really sees. Best thermal scope for coyote hunting by budget We carry every brand, so these picks are honest across the price range, not just one make. Category Pick Sensor Notes Best all-round with a rangefinder Pulsar Thermion 2 LRF up to HD 800m LRF + ballistics, best software Best value, no LRF Pulsar Thermion 2 384/640 Same handling, lower price Best long-range flagship ThermTec Ares 650 LRF 640 1,000 m LRF, open-country reach Best budget entry AGM Rattler TS35-384 384 Real capability, lowest spend Compare the full range on the thermal riflescopes page. Best budget thermal scope for coyote hunting If money is tight, the AGM Rattler line gives genuine coyote capability at the lowest sensible spend, with a 384 sensor and a 35 mm lens that suits calling distances. It won’t match a flagship for reach or software, but for a hunter shooting coyotes within 250 yards, it does the job. Best

thermal monocular vs scope vs clip-on
Blogs

Thermal Monocular vs Scope vs Clip-On

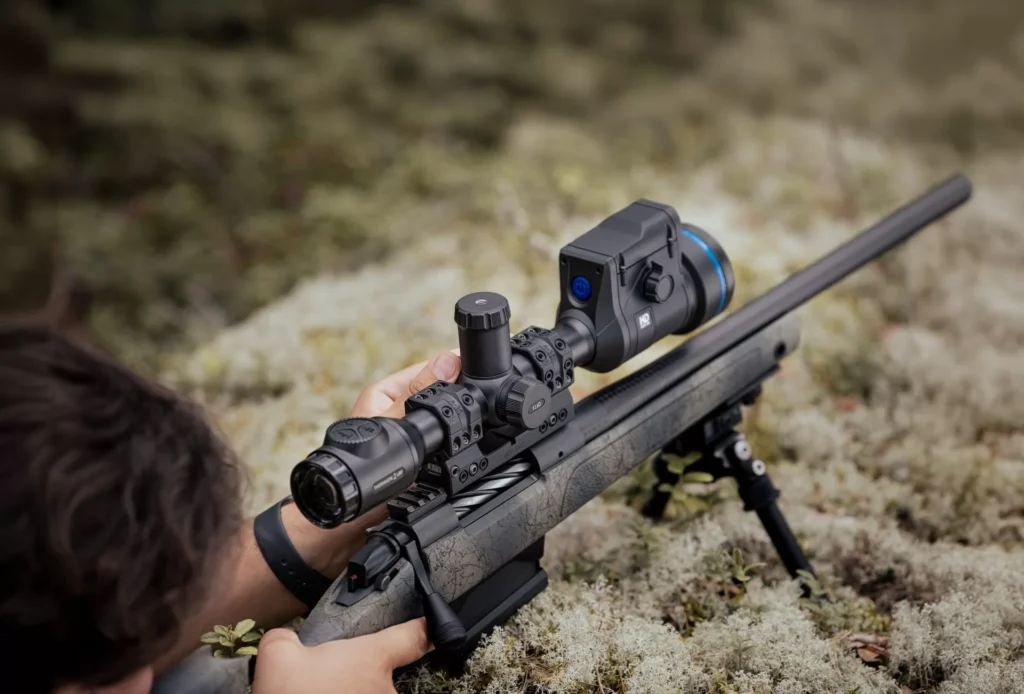
Thermal Monocular vs Scope vs Clip-On: Which Do You Need? A thermal monocular is for scanning and finding game, a thermal riflescope is for aiming and shooting, and a thermal clip-on turns your existing day scope into a thermal sight. Most hunters should buy a monocular first, then add a scope or clip-on once they know how they hunt. Choosing between a thermal monocular vs scope vs clip-on comes down to one question: do you need to find game, shoot it, or keep your current rifle setup? This guide breaks down each type, what it is best at, and how they work together. It sits within our complete guide to thermal imaging for hunting. Thermal monocular vs scope vs clip-on: the quick answer Device Mounts on a rifle? Main job Best for Monocular No, handheld Scanning and finding game Your first thermal; every hunter Riflescope Yes, replaces day scope Aiming and shooting at night A dedicated night rifle Clip-on Yes, in front of day scope Converting a day scope, keeps zero One rifle for day and night Thermal monoculars: for scanning A thermal monocular is a handheld scanner, and it is the device most hunters should own first. You use it to scan the ground, find heat, and confirm what is out there before moving, but you do not aim a rifle with it. Because it does one job well and costs less than a scope, it is the most useful single thermal device you can buy. Monoculars range from entry-level models like the AGM Asp-Micro TM-160 to long-range 640 units like the AGM Sidewinder TM50-640. If you hunt with a day scope and want to start seeing game at night, a monocular is where to begin. See the full range of thermal monoculars. Thermal riflescopes: for aiming A thermal riflescope mounts on your rifle and is what you aim and shoot with in the dark. It replaces your day scope for night work and has its own reticle and zero, so you sight through the thermal directly. This gives the most integrated night setup, but it means a separate rifle or swapping scopes between day and night. Models range from the AGM Rattler TS35-384 to the long-range ThermTec Ares 650 LRF, which adds a built-in laser rangefinder. A dedicated thermal scope suits hunters who do most of their shooting at night and want a rifle set up for it. Browse thermal riflescopes. Thermal clip-ons: keep your day scope A thermal clip-on mounts in front of your existing day scope and turns it into a thermal sight, keeping your normal reticle and zero. You get thermal at night without giving up your familiar day optics, and you can remove it in seconds for daytime use. This is the most flexible option if you want one rifle for both day and night. The trade-off is that image quality depends partly on the day scope behind it, and a clip-on adds weight and length up front. The AGM Rattler TC series and PixFra Chiron clip-ons are popular here. We compare the two paths in detail in thermal clip-on vs dedicated scope. Which should you buy first? Buy a monocular first. It solves the hardest part of night hunting, which is finding the animal, and it works with any rifle and any day scope you already own. A scope or clip-on only helps once you have located your target, so it makes sense to start with the device that does the finding. Our common advice to new buyers is simple. Get a 384 monocular; learn how thermal behaves on your ground, and you will quickly understand whether you want a dedicated scope or a clip-on next. Buying a scope first, before you have ever scanned with thermal, is the most common and most expensive mistake we see. The best setup: combine them The most effective night-hunting setup uses two devices: a monocular to find game and a scope or clip-on to take the shot. You keep the wide, fast monocular moving to locate animals, then bring the rifle up only when you have a target. This saves battery, saves your arms, and keeps finding and aiming as separate, safer steps. We walk through it in the two-optic night setup. How much does each cost? Price often decides the order you buy in, so here is the rough lie of the land. Thermal monoculars start from around €420 for an entry unit and run to roughly €3,000 for a long-range 640. Thermal riflescopes start higher, from around €1,000, and reach over €5,000 for a flagship with a built-in rangefinder. Clip-ons sit broadly alongside scopes, from around €1,000 upward, since they are a similar piece of kit in a different format. Because a capable monocular costs less than most scopes and clip-ons, starting with one spreads the cost while giving you the most useful device first. Frequently asked questions Do I need all three? No. Most hunters are well served by a monocular plus either a scope or a clip-on. Start with the monocular for scanning, then add the aiming device that fits your rifle and budget. You only need all three if you run several rifles or hunt in very different ways. Quick facts: thermal monocular vs scope vs clip-on Monocular Handheld, for scanning and finding game Riflescope Replaces day scope, for aiming at night Clip-on Front-of-day scope, keeps zero, day and night Buy first A 384 monocular Best setup Monocular to find, scope or clip-on to shoot Need all three? No, most hunters use two

Shopping Cart
Scroll to Top