Author name: Black Reckon

marine night vision camera
Marine cameras

Flir marine buying guides

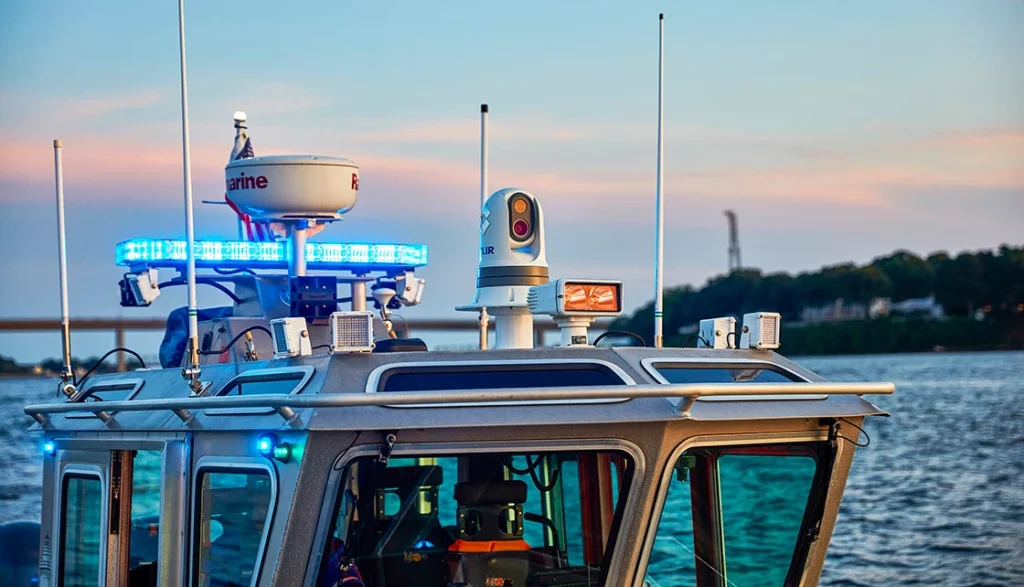
The Best Marine Night Vision Camera: How to Choose (2026) A marine night vision camera lets you see vessels, buoys, floating hazards, and people in the water when it is too dark to navigate safely by eye. Almost every marine night vision camera sold today is thermal, because thermal reads heat rather than light and continues to work on moonless nights offshore. This guide explains the three types of camera, the specifications that decide whether one is any good, what you should expect to pay, and which is the best marine night vision camera for your boat. Browse the full range of marine night vision cameras whenever you want to see current stock and prices in euros. If you already know the type you need, jump to our guides on thermal versus low-light, chartplotter compatibility, or cooled versus uncooled. The best marine night vision camera: quick picks Short on time? Here is the best marine night vision camera for each kind of boating, from the FLIR range we stock. Details on every model are further down. Now here’s the full guide to choosing the right one. Why thermal is the standard for night vision for boats Ashore, you can choose between thermal and light-amplifying night vision. Afloat, thermal has won, and the reasons are practical rather than technical. A thermal camera needs no ambient light whatsoever. It reads the long-wave infrared every object radiates, which means a marine night vision camera works identically at 3am under overcast conditions with no moon and no shore glow. It also handles glare. Point a light-based system at a marina, an approaching vessel’s masthead light, or your deck lights, and it blooms; thermal simply ignores them because it does not detect light. Then there is contrast. Water holds a fairly steady, cool temperature, and almost everything you need to avoid is warmer than it. Another boat’s engine and cabin, a channel marker warmed by the day’s sun, a paddleboarder, and a swimmer all stand out against the cool sea as bright, obvious shapes. Against the cool sea, each shows as a bright, obvious shape. That contrast advantage is why a marine thermal night vision camera is now standard fit on serious night-running vessels, and it is also the single strongest argument for having one aboard during a man-overboard search. A person in the water is nearly invisible to the eye and to a searchlight beyond a short distance. On thermal, they appear as a white dot on black water. The honest limitation: thermal shows heat and shape, not detail. It shows you that something is there and gives you a rough idea of its size. It will not read a hull number or show you a color. Where identification matters as much as detection, you want a second imaging channel, which our thermal versus low-light guide covers in full. The three types of marine night vision cameras Handheld thermal monoculars The simplest way aboard. You pick it up, scan it, and put it down. A handheld suit backs up navigation, quick checks on contacts you cannot identify, and man-overboard searches where you need to sweep fast and follow the person. Marine handhelds should float and be properly waterproof, because sooner or later one goes over the side. The FLIR Ocean Scout Pro is built to that brief. A handheld will not give you continuous vision while steering, nor will it appear on your chart plotter. Treat it as a complement to a fixed camera or as the entry point for a smaller boat. Fixed-mount thermal cameras A fixed camera bolts to the boat, looks forward, and streams a constant thermal picture to a display. There is nothing to aim at and nothing to hold on to. For docking, river and inshore running, and for keeping a permanent forward watch on passage, a compact fixed unit like the FLIR MD Series does the job at a lower price and in much smaller housing than a steerable system. The trade is that you only see where the camera points. If a contact is out of your quarter, you will not have it. Pan-and-tilt thermal cameras A pan-and-tilt camera steers left, right, up, and down under your control, and the better ones are gyro-stabilized to hold a level picture as the boat moves. This is the category for offshore running and active night navigation, allowing you to sweep around the vessel and hold contact as you close in on it. The FLIR M-Series spans this range, from the entry M232 up to the stabilized 640 M364. A full pan-and-tilt setup is the closest thing to a complete marine night vision camera system, giving you steerable all-round vision from the helm. Stabilization is not a luxury here. An unstabilized camera at any real magnification is unusable in a seaway, because every pitch throws the image off the target. Type comparison Handheld Fixed mount Pan and tilt Best for Backup, MOB search Docking, inshore Offshore, night passage Shows on chartplotter No Yes. Yes. Steerable By hand No Yes. Stabilized No No On better models Typical price €1,500-1,900 €5,800+ €4,000-14,500 FLIR example Ocean Scout Pro MD Series M-Series How to choose the best marine night vision camera Five decisions cover almost every purchase. Please work through them in this order. Thermal resolution Resolution sets how far out a shape stops being a blob and becomes something you can act on. A 320×240 core is genuinely capable for smaller boats, inshore work, and docking. A 640×512 core roughly doubles the linear detail, which matters offshore and on larger vessels where you want to make a decision about a contact earlier. If you want the underlying principle in more depth, our general explainer on 384 versus 640 thermal sensors applies equally at sea. Buy resolution before you buy range figures. It is the specification you will notice every single night. Camera type and mounting Match the type to how you actually run, not to how you imagine running. Handheld for backup
Blogs

thermal Pricing

How Much Does a Thermal Scope or Monocular Cost? (2026 Price Guide) A thermal scope costs from around €1,000 for an entry model to over €5,000 for a flagship with a built-in rangefinder, while thermal monoculars start from around €420. Most hunters spend between €1,500 and €3,000 for a capable device that lasts for years. What you pay comes down mainly to sensor resolution, thermal sensitivity, and whether the device includes a rangefinder, so this guide breaks down real prices and shows where your money goes. It sits within our complete guide to thermal imaging for hunting. The prices below are guide figures in euros and vary by model and stock availability. How much does a thermal scope cost? Thermal riflescopes are the most expensive thermal device because they combine a thermal core with a shooting-grade, recoil-rated sight. Here is the lie of the land. Budget What you get Example €1,000 to €2,000 Entry-level to mid-range 384 thermal scope AGM Rattler TS35-384 €2,000 to €3,500 Strong 384 or 640 scope, some with LRF Pulsar Thermion 2, ThermTec Ares €3,500 to €5,000 Flagship 640 or HD with rangefinder and ballistics Pulsar Thermion 2 LRF, ThermTec Ares 650 LRF €5,000+ Top HD long-range and multispectral HD and Duo models How much does a thermal monocular cost? Thermal monoculars are the most affordable way into thermal imaging because they are handheld scanners without a shooting-grade mount. Entry units start from around €420, mid-range 384 models sit between €1,000 and €2,000, and flagship 640 monoculars run from roughly €2,300 to €3,300. Budget What you get Example €400 to €900 Entry 160 or 256 monocular AGM Asp-Micro TM-160 (€423) €1,000 to €2,000 Capable 384 monocular AGM Taipan and Sidewinder 384 €2,000 to €3,300 640 monocular, some with LRF AGM Sidewinder TM50-640, Pulsar Telos See the range on the thermal monoculars page. What drives the price of a thermal device? Five things push the price up. Higher sensor resolution (640 costs more than 384, which costs more than 256) is the biggest factor. A lower NETD, meaning higher thermal sensitivity, adds cost. A longer, faster lens increases both reach and price. A built-in laser rangefinder and ballistic calculator add a clear premium. And extras like HD displays, higher-capacity recording, and a premium build all add up. Understanding this is why we always say spend on the sensor first; the reasoning is in 384 vs 640 thermal. Price by sensor resolution Sensor Monocular from Scope from 160 / 256 ~€420 Rare in scopes 384×288 ~€1,150 ~€1,000 to €2,000 640×512 ~€2,300 ~€2,300 to €4,000 HD 1024×768 Premium ~€4,000+ Are cheap thermal scopes worth it? A budget thermal device is worth it if you match your expectations to it. An entry-level 160 or 256 monocular is a genuinely useful scanner and recovery tool and a great first thermal. What disappoints is buying the cheapest option while expecting long-range identification, which needs a bigger sensor. Our honest advice is to buy the best sensor you can afford rather than the most magnification and to avoid unknown, unsupported brands where warranty and service are uncertain. How to get the best value Spend on resolution first, then the lens for your range, and treat digital zoom and extras as secondary. Buy from a retailer that handles the warranty and offers real support, so a fault does not leave you stranded. And consider a monocular first: it is the cheapest device that solves the hardest part of night hunting, which is finding game. If you want help matching a budget to a device, contact us. Frequently asked questions Hidden costs to budget for The device price is not the whole cost, so plan for a few extras. Spare batteries or a power bank keep you running through long nights. A scope needs a set of quality mounts or rings, and a clip-on requires a stable mount. Thermal zeroing targets, a durable case for transport, and a spare lens cloth are worth having. Firmware and app features are usually free, but consider the value of buying from a retailer that handles the warranty and offers support, as a repair or service turnaround can incur real costs if you have to deal with a manufacturer overseas. Contact Blackreckon for inquiries. Quick facts: thermal scope and monocular cost Thermal monocular from ~€420 Thermal scope from ~€1,000 Typical hunter spend €1,500 to €3,000 Flagship with LRF €3,500 to €5,000+ Biggest price driver Sensor resolution Best value tip Buy sensor first, not the magnification.

Blogs

Thermal clip-on vs scope

Thermal Clip-On vs Dedicated Thermal Scope A thermal clip-on mounts in front of your existing day scope and keeps its zero, so one rifle works day and night, while a dedicated thermal scope replaces your day optic and gives a slightly cleaner, more integrated night image. Choose a clip-on for flexibility on a single rifle and a dedicated scope for the best dedicated night setup. The thermal clip-on vs scope decision really comes down to whether you want one versatile rifle or a rifle built for the dark. This guide is part of our complete guide to thermal imaging for hunting, and follows from thermal monocular vs scope vs clip-on. Thermal clip-on vs scope: the quick answer Factor Thermal clip-on Dedicated thermal scope How it mounts In front of your day’s scope Replaces your day scope Keeps day scope zero Yes N/A (own reticle and zero) Day and night on one rifle Yes No, night-focused Night image quality Very good, depends on the day’s scope. Cleanest, most integrated Weight and length Adds to the front of the rifle Self-contained Best for One flexible rifle A dedicated night rifle What is a thermal clip-on? A thermal clip-on is a thermal device that attaches in front of your normal day scope and turns it into a thermal sight. You keep looking through your day scope and its reticle so your existing zero stays intact, and you remove the clip-on for daytime in seconds. Some monocular-style units, such as the Pulsar Krypton 2, work both as a handheld spotter and as a front clip-on, which adds even more flexibility. The appeal is simple: one rifle, one zero, day and night. What is a dedicated thermal scope? A dedicated thermal riflescope replaces your day scope entirely and carries its own thermal reticle and zero. You aim and shoot through thermal directly, with the sight built as one complete system, which tends to give the cleanest image and the most features, including built-in rangefinders on models like the Pulsar Thermion 2 LRF. The trade is that the rifle is now set up for night work, so you either swap scopes for daytime or keep a separate day-time rifle. Browse options on the thermal riflescopes page. Pros and cons of each A clip-on wins in flexibility. You keep your familiar day scope and zero, convert one rifle for night use, and avoid buying a second optic setup. It can cost less overall if you already own a good day scope. The downsides are added length and weight at the front and a night image that depends partly on the quality of the day scope behind it. A dedicated scope wins on image quality and integration. It usually gives the cleanest, most detailed night picture, the most built-in features, and a purpose-built reticle. The downside is that it commits the rifle to night use, and you lose your day scope on that rifle unless you swap optics. Which should you choose? Choose a clip-on if you hunt both day and night with one rifle, already own a day scope you trust, and value flexibility. Choose a dedicated scope if you want the best possible night image, hunt mostly at night, or want built-in ranging and ballistics on a rifle set up for the dark. Many experienced hunters end up with both over time, using a clip-on on a general rifle and a dedicated scope on a night rifle. Do thermal clip-ons keep your zero? Yes, a quality clip-on on a stable, repeatable mount preserves your day scope’s zero because you still aim through your normal reticle. The clip-on simply feeds a thermal image into the front of the day scope. Poor alignment or a flimsy mount can shift your point of impact, so the mount and correct fitting matter. Many hunters move a single clip-on between rifles once they have confirmed it holds zero. Frequently asked questions (FAQ) Quick facts: thermal clip-on vs scope Clip-on mounts In front of your day scope, keeps zero Scope mounts Replaces the day scope, own zero Clip-on best for One rifle, day and night Scope best for A dedicated night rifle, best image Both need A handheld spotter to find game

Blogs

384 vs 640 Thermal

384 vs 640 Thermal: Is the Upgrade Worth the Money? A 640 thermal sensor shows more detail and identifies game at greater distances than a 384, but it costs significantly more. For most European hunting, a 384 is enough and the better value, while a 640 earns its price only if you hunt open ground at long range or need to identify targets far away. The 384 vs 640 thermal decision is really a question of how far you hunt and how much detail you need at distance. This guide explains the real difference, when each makes sense, and what they cost. For the bigger picture, see our complete guide to thermal imaging for hunting. 384 vs 640 thermal: What is the real difference? The numbers refer to the thermal sensor’s pixel count: a 384 sensor is 384×288 pixels, and a 640 sensor is 640×512. A 640 has more than twice the pixels of a 384, so it packs more detail into the same image. That extra detail does two things: it makes the picture look sharper, and it lets you identify what an animal is at a greater distance, because more pixels fall on the target. For the full-resolution ladder, see thermal sensor resolution explained. 384 vs 640 compared Factor 384×288 640×512 Pixel count 110,592 327,680 Image detail Good Noticeably sharper Identification range Strong at typical hunting distances Better at long range Field of view (same lens) Narrower Wider Best use All-round night hunting Long range and open ground Typical price From around €1,150 From around €2,300 One detail many buyers miss: at the same focal length, a 640 sensor gives a wider field of view than a 384, because the larger sensor captures more of the scene. That makes 640 units easier to scan with as well as sharper. When 384 is enough (and saves you money) A 384 sensor is enough for most hunting in Europe, and choosing it over a 640 can save you €1,000 or more. At the ranges most boar, fox, and deer are detected and shot; a 384 detects and identifies game well. If you hunt woodland, field edges, and mixed ground out to a few hundred meters, a good 384, such as the AGM Sidewinder TM35-384, with its sub-20 mK sensor, gives you a clean, capable image without paying for reach you will rarely use. Put the money you save toward a better lens or a spare battery instead. When 640 is worth it A 640 sensor is worth the extra cost when you hunt open ground at long range or when identifying a target at a distance matters. On an open hill, in large fields, or when foxing across stubble, the extra detail of a 640 lets you identify what an animal is much further out, which can make the difference between a confident shot and a wasted stalk. If you regularly work beyond a few hundred meters or simply want the sharpest image available, a 640 like the AGM Sidewinder TM35-640 or the ThermTec Ares 650 LRF is worth the expense. Compare them in the thermal monoculars range. Does a 640 detect further than a 384? Not necessarily for raw detection, because the lens drives detection range as much as the sensor. A 384 with a long 50 mm lens can detect heat as far as a 640 with a shorter lens. The 640 excels in identification, as it clearly indicates the heat source at a greater distance by resolving more detail. So if your goal is spotting heat far away, lens matters most; if your goal is identifying it far away, the 640 sensor matters most. We explain detection versus identification in how far can a thermal monocular see. 384 vs 640 by price Here is how the two sit in the catalogue, using comparable models so the gap is clear. Model Sensor Lens Price AGM Taipan TM15-384 384×288 15 mm €1,156 AGM Sidewinder TM35-384 384×288 35 mm €1,958 AGM Sidewinder TM35-640 640×512 35 mm €2,315 AGM Sidewinder TM50-640 640×512 50 mm €2,918 Comparing the two Sidewinder TM35 models, which share the same 35 mm lens, the step from 384 to 640 costs around €357. That is the clearest way to see what the resolution upgrade alone is worth. Frequently asked questions Resolution or NETD: Which matters more? Both matter, but they do different jobs. Resolution drives how much detail you see and how far you can identify game, while NETD drives how cleanly a warm target separates from its background, especially in damp or low-contrast conditions. A 384 with a low sub-20 mK NETD can give a more usable image on a mild, wet night than a 640 with a higher NETD. Look at the two together rather than chasing pixel count alone. Quick facts: 384 vs 640 thermal 384 pixel count 384×288 (110,592 pixels) 640 pixel count 640×512 (327,680 pixels) 384 is best for All-round hunting, best value 640 is best for Long range and identification Detection range driver Mainly the lens, not the sensor Typical price gap (same lens) Around €350 to €600

best thermal scope for coyote hunting
Blogs

The Best Thermal Scope for Coyote Hunting

Best Thermal Scope for Coyote Hunting: 2026 Buyer’s Guide The best thermal scope for coyote hunting is one with a 384 or 640 sensor, thermal sensitivity below 20 mK, and enough magnification and range to identify a coyote across open ground at night. Coyotes are shot at distance, often on the move, and frequently against low-contrast winter backgrounds, so the scope that suits them is not always the one that suits close-cover hog hunting. This guide shows you how to choose the right one, with picks by budget and an honest comparison across every brand we carry. We stock them all, so unlike the manufacturer guides you will compare these models against; we have no reason to push one make. New to thermal entirely? Start with our complete guide to thermal imaging for hunting, or if you are still choosing a device type, read thermal monocular vs scope vs clip-on. Browse the full thermal riflescope range any time. Quick answer: best thermal scope for coyote hunting Short on time? Here is the shortlist. Now the full guide. Why coyote hunting demands a specific thermal scope Coyotes are one of the more demanding quads for a thermal scope, and understanding why helps you choose the right specs. They are shot at a distance. Unlike hogs, which often appear in or near cover at moderate range, coyotes are commonly called and shot across open fields and pastures, frequently out past 150 to 300 yards. That puts a premium on resolution and useful magnification, because you need to identify the animal and place a precise shot far out. They are often low-contrast. A coyote’s coat against frosted winter stubble or cold pasture can give a weaker heat signature than a hog’s bare skin against warm ground. That is precisely where thermal sensitivity (NETD) earns its keep: a sub-20 mK sensor separates a coyote from cold ground where a less sensitive scope shows a vague blur. They move, and they are wary. Called coyotes often come in fast, circle downwind, and rarely stand still for long. A smooth 50 Hz image and a scope you can get on target quickly matter more than they do for a stationary hog. They are frequently shot in cold weather. Coyote season peaks in winter, when cold, damp air and long sessions test both the sensor and the battery. Rugged build and real battery life matter. Put together, the best thermal scope for coyote hunting leans toward good resolution, low NETD, useful magnification for distance, and a rangefinder more than a close-cover hog scope does. What makes a great thermal scope for coyotes? A great coyote thermal scope gets five things right. Sensor resolution. The sensor resolution is 256, 384, or 640, and it determines how far you can identify a coyote rather than just detect heat. For coyotes at typical calling distances, a 384 sensor is the practical choice, and a 640 sensor is worth the extra cost on genuinely open ground. See 384 vs 640 thermal. Thermal sensitivity (NETD). Below 20 mK keeps the image clear in the damp, low-contrast winter conditions that coyote hunters most often face. This matters more for coyotes than for almost any other quarry. Detection and identification range. More on the honest math below, but you want enough real identification range for the distances you actually shoot, not the biggest advertised detection number. A smooth image and quick handling. A 50 Hz refresh rate keeps a moving, circling coyote sharp, and a scope you can get on target fast turns a passing shot into a taken one. It has a rugged, weatherproof build and a recoil rating that matches your caliber. It has to hold zero on your rifle and keep working through a cold, wet night. A built-in laser rangefinder and ballistic calculator, as on the Pulsar Thermion 2 LRF, turn a good coyote scope into a confident long-range tool, because knowing the exact distance to a coyote at 250 yards is the difference between a clean shot and a guess. Detection range vs. identification: the coyote truth Here is the thing every spec sheet glosses over, and it matters more for coyotes than most quarry. The advertised detection range is not how far you can tell it is a coyote. Detection means “something warm is there.” Identification, telling a coyote from a fox, a dog, or a deer, and placing an ethical shot, happens at roughly an eighth of the detection figure in the conservative reading, and cold, damp air shortens it further. Advertised detection Realistic recognition (~25%) Realistic identification (~12.5%) 1,800 m ~450 m ~225 m 2,400 m ~600 m ~300 m 2,600 m ~650 m ~325 m Since most coyotes are shot inside 300 yards, a scope with a genuine 2,000 m plus detection figure gives you a comfortable identification range for real coyote distances. Do not overpay for a detection number you will never use, and do not assume a big detection figure means a long identification range. Sensor resolution and NETD drive real identification distance. More on how far thermal really sees. Best thermal scope for coyote hunting by budget We carry every brand, so these picks are honest across the price range, not just one make. Category Pick Sensor Notes Best all-round with a rangefinder Pulsar Thermion 2 LRF up to HD 800m LRF + ballistics, best software Best value, no LRF Pulsar Thermion 2 384/640 Same handling, lower price Best long-range flagship ThermTec Ares 650 LRF 640 1,000 m LRF, open-country reach Best budget entry AGM Rattler TS35-384 384 Real capability, lowest spend Compare the full range on the thermal riflescopes page. Best budget thermal scope for coyote hunting If money is tight, the AGM Rattler line gives genuine coyote capability at the lowest sensible spend, with a 384 sensor and a 35 mm lens that suits calling distances. It won’t match a flagship for reach or software, but for a hunter shooting coyotes within 250 yards, it does the job. Best

thermal monocular vs scope vs clip-on
Blogs

Thermal Monocular vs Scope vs Clip-On

Thermal Monocular vs Scope vs Clip-On: Which Do You Need? A thermal monocular is for scanning and finding game, a thermal riflescope is for aiming and shooting, and a thermal clip-on turns your existing day scope into a thermal sight. Most hunters should buy a monocular first, then add a scope or clip-on once they know how they hunt. Choosing between a thermal monocular vs scope vs clip-on comes down to one question: do you need to find game, shoot it, or keep your current rifle setup? This guide breaks down each type, what it is best at, and how they work together. It sits within our complete guide to thermal imaging for hunting. Thermal monocular vs scope vs clip-on: the quick answer Device Mounts on a rifle? Main job Best for Monocular No, handheld Scanning and finding game Your first thermal; every hunter Riflescope Yes, replaces day scope Aiming and shooting at night A dedicated night rifle Clip-on Yes, in front of day scope Converting a day scope, keeps zero One rifle for day and night Thermal monoculars: for scanning A thermal monocular is a handheld scanner, and it is the device most hunters should own first. You use it to scan the ground, find heat, and confirm what is out there before moving, but you do not aim a rifle with it. Because it does one job well and costs less than a scope, it is the most useful single thermal device you can buy. Monoculars range from entry-level models like the AGM Asp-Micro TM-160 to long-range 640 units like the AGM Sidewinder TM50-640. If you hunt with a day scope and want to start seeing game at night, a monocular is where to begin. See the full range of thermal monoculars. Thermal riflescopes: for aiming A thermal riflescope mounts on your rifle and is what you aim and shoot with in the dark. It replaces your day scope for night work and has its own reticle and zero, so you sight through the thermal directly. This gives the most integrated night setup, but it means a separate rifle or swapping scopes between day and night. Models range from the AGM Rattler TS35-384 to the long-range ThermTec Ares 650 LRF, which adds a built-in laser rangefinder. A dedicated thermal scope suits hunters who do most of their shooting at night and want a rifle set up for it. Browse thermal riflescopes. Thermal clip-ons: keep your day scope A thermal clip-on mounts in front of your existing day scope and turns it into a thermal sight, keeping your normal reticle and zero. You get thermal at night without giving up your familiar day optics, and you can remove it in seconds for daytime use. This is the most flexible option if you want one rifle for both day and night. The trade-off is that image quality depends partly on the day scope behind it, and a clip-on adds weight and length up front. The AGM Rattler TC series and PixFra Chiron clip-ons are popular here. We compare the two paths in detail in thermal clip-on vs dedicated scope. Which should you buy first? Buy a monocular first. It solves the hardest part of night hunting, which is finding the animal, and it works with any rifle and any day scope you already own. A scope or clip-on only helps once you have located your target, so it makes sense to start with the device that does the finding. Our common advice to new buyers is simple. Get a 384 monocular; learn how thermal behaves on your ground, and you will quickly understand whether you want a dedicated scope or a clip-on next. Buying a scope first, before you have ever scanned with thermal, is the most common and most expensive mistake we see. The best setup: combine them The most effective night-hunting setup uses two devices: a monocular to find game and a scope or clip-on to take the shot. You keep the wide, fast monocular moving to locate animals, then bring the rifle up only when you have a target. This saves battery, saves your arms, and keeps finding and aiming as separate, safer steps. We walk through it in the two-optic night setup. How much does each cost? Price often decides the order you buy in, so here is the rough lie of the land. Thermal monoculars start from around €420 for an entry unit and run to roughly €3,000 for a long-range 640. Thermal riflescopes start higher, from around €1,000, and reach over €5,000 for a flagship with a built-in rangefinder. Clip-ons sit broadly alongside scopes, from around €1,000 upward, since they are a similar piece of kit in a different format. Because a capable monocular costs less than most scopes and clip-ons, starting with one spreads the cost while giving you the most useful device first. Frequently asked questions Do I need all three? No. Most hunters are well served by a monocular plus either a scope or a clip-on. Start with the monocular for scanning, then add the aiming device that fits your rifle and budget. You only need all three if you run several rifles or hunt in very different ways. Quick facts: thermal monocular vs scope vs clip-on Monocular Handheld, for scanning and finding game Riflescope Replaces day scope, for aiming at night Clip-on Front-of-day scope, keeps zero, day and night Buy first A 384 monocular Best setup Monocular to find, scope or clip-on to shoot Need all three? No, most hunters use two

Blogs

Thermal Monocular for Hunting

Thermal Monocular for Hunting: The Complete 2026 Buyer’s Guide A thermal monocular for hunting is a handheld device that detects the body heat of game, so you can find and identify animals in complete darkness, fog, and cover. It is the single most useful thermal tool for night hunting, because it solves the hardest part of the job: locating your quarry before you ever raise a rifle. This guide covers how to choose one, the best picks by budget and by quarry, and an honest comparison of every major brand. We stock them all, so unlike the manufacturer guides you will compare these models against; we have no reason to push one make. A hunter’s perspective: why thermal changed the game Field notes from Mathew Petr, our lead optics reviewer, with 15+ years of night hunting A few years back, deer hunting ended the moment the light started to fade. If you wanted to squeeze out those last critical minutes before dusk, your only option was dropping two or three thousand euros on high-end glass. Even then, telling a young buck from a cull animal in deep shadow was a nerve-wracking guessing game. Thermal technology changed that. A solid thermal monocular provides you clarity in low light that standard optical glass simply cannot. Instead of staring into dark woods hoping for a silhouette, you get an immediate read on an animal’s body size, posture, and movement, the cues that drive a cull decision, and a clear heat signature you can then confirm before you ever raise the rifle. Thermal won’t count tines; that fine detail still belongs to a day optic or night vision, but it tells you an animal is there, roughly what it is, and where, long before your eye could. Using a monocular rather than a binocular keeps your non-dominant eye fully adjusted to the dark. You get clear thermal target identification without blowing out your natural night vision, which is one of the quiet reasons experienced hunters reach for a handheld monocular first. Beyond finding and assessing game, thermal brings a real safety upgrade to every hunt. When you can pick up a heat signature past a kilometer away, you know instantly whether your backstop is safe and your shooting lane is clear before you take the shot. New to thermal entirely? Start with our complete guide to thermal imaging for hunting, then come back here for the monocular-specific detail. You can browse the full thermal monocular range any time. Quick answer: the best thermal monocular for hunting Short on time? Here are the picks most hunters should consider. Now the full guide. Best thermal monocular for hunting: our picks by category We stock every brand, so these are the picks we would actually make, not just the ones we happen to build. Category Pick Sensor NETD Price Best overall value ThermTec Cyclone 640 12 µm <20 mK €899 Best on a budget HIKMICRO Lynx 3.0 256/384 model-dependent from €329 Best all-rounder ThermTec Cyclops 3.0 640 12 µm ≤25 mK €1,190-1,390 Best image quality ThermTec Wild Pro 640 12 µm <15 mK €2,890 Best build & software Pulsar Axion 2 384/640 <25-40 mK POA Best for mixed terrain ThermTec Cyclops-D 640 12 µm ≤25 mK €1,890 Longest warranty AGM Sidewinder 384 12 µm ≤20 mK POA Tested in the field by Mathew Petr, our lead optics reviewer, with 15+ years of night hunting. The hands-on notes throughout this guide are his, based on real nights behind each device. [Add a short author bio + photo here for E-E-A-T; link to an author page if you have one.] Why a thermal monocular is the first thermal you should buy A monocular is a handheld, one-device scanner, not a rifle-mounted sight. That makes it the safest and most versatile way to get into thermal imaging. You use it to scan fields and woods, spot a fox or hog by its heat, and confirm what it is before deciding what to do. A monocular also works for tracking wounded game and recovering downed animals, jobs a scope cannot do safely. Many hunters run a monocular alongside a day scope or a thermal scope, scanning with the handheld and shooting with the rifle. Monocular, scope, clip-on, or binocular? Four device types, four jobs. Buying the wrong thermal device is the most expensive mistake you can make. Thermal monocular Thermal scope Thermal clip-on Thermal binocular Purpose Find and identify Take the shot. Convert a day scope. Long observation Rifle mounted No Yes. Yes. No Both eyes No No No Yes. Typical price €899-2,890 €1,690-3,690 €1,490-2,690 €2,990-3,690 Buy first? Usually yes. After a monocular If you own a day scope If you glass for hours The rule that matters: a monocular finds a game; a rifle-mounted device shoots it. Scanning with a scope means pointing a firearm at everything you want to identify, which is unacceptable regardless of how effective the optic is. That is why most experienced thermal hunters own a monocular even when they also own a thermal scope or a thermal clip-on. If you glass for hours at a stretch rather than in bursts, look at thermal binoculars instead, where two-eye viewing removes the fatigue a monocular builds up. Our full comparison of monocular, scope, and clip-on covers the decision in more depth, and thermal versus night vision covers the more basic choice. How to choose a thermal monocular for hunting Four specifications decide how a handheld thermal monocular performs in the field. Get these right, and everything else follows. Sensor resolution Resolution is the biggest driver of how far you can identify game, not just detect it. A 384×288 sensor handles close to mid-range work and keeps the price down. A 640×512 sensor adds detail and reach, so you distinguish a fox from a hare or antlers from brush further out. If your budget allows, a 640 sensor is the better long-term buy. Full details on 384 vs 640 thermal performance. Thermal sensitivity (NETD) NETD measures the

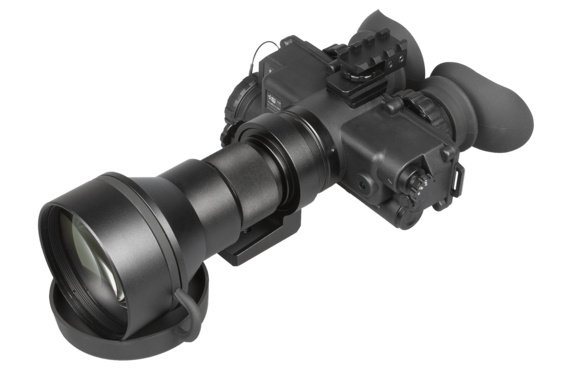
AGM Foxbat-5 NL1 Night Vision Binocular (Gen 2+ 5x, Green Phosphor)
Blogs

How Far Can a Thermal Monocular See?

How Far Can a Thermal Monocular See? A thermal monocular can detect a person-sized heat source from around 250 m on an entry model to over 2,600 m on a flagship 640 unit. But detection is not identification. The distance at which you can actually tell what an animal is sits much closer, usually a third to a half of the quoted detection range. Understanding that gap is the key to knowing how far a thermal monocular really sees. This guide explains the real numbers, what the marketing figures mean, and what affects your range in the field. It is part of our complete guide to thermal imaging for hunting. How far can a thermal monocular see in practice? Range depends almost entirely on two things: the sensor resolution and the lens. A bigger sensor and a longer lens see farther. As a rough guide, entry 160 and 256 units detect heat at 250 m to 460 m, mid-range 384 models reach 650 m to 1,600 m, and high-resolution 640 units with a large lens detect out to around 2,600 m. Those are detection figures, the distance at which you can tell something warm is there. Detection vs recognition vs identification (DRI) The single most important thing to understand is that a thermal monocular sees a heat source much further than it lets you identify one. The industry splits range into three stages, known as DRI. Stage What you can tell Relative distance Detection Something warm is there Furthest (the quoted figure) Recognition It is an animal, and roughly what type Around half of detection Identification Exactly what it is, and a precise aiming point Roughly a third of detection So a monocular with a 2,000 m detection range might let you recognize an animal at about 1,000 m and identify it at around 600 m, depending on the device and conditions. When you compare models, treat the big detection number as a marketing-friendly ceiling, not a working distance. We cover the topic in more depth in what DRI range really means. What affects how far a thermal monocular sees? Several factors change your real-world range, and most are in the spec sheet if you know where to look. Thermal monocular range by sensor Here is how detection range scales across the catalog, using real models so you can see the pattern. Model Sensor Lens Detection range AGM Asp-Micro TM-160 160×120 6.2 mm ~250 m AGM Taipan TM15-256 256×192 15 mm ~458 m AGM Taipan TM25-384 384×288 25 mm ~1,180 m AGM Sidewinder TM35-640 640×512 35 mm ~1,650 m AGM Sidewinder TM50-640 640×512 50 mm ~2,600 m Notice how the lens drives detection as much as the sensor: the two 640 units differ only by lens, and the 50 mm reaches farther. Browse the full range of thermal monoculars to compare. How to get the most range from your thermal monocular You can squeeze the best range out of any device with a few simple habits. Scan slowly and let the image settle rather than sweeping fast. Hunt in the cooler hours, since dawn, dusk, and night give the strongest heat contrast. Keep the lens clean, because grime scatters infrared. And use the lowest digital zoom that lets you work, because it enlarges pixels without adding real detail. If long range matters to you, put your budget into sensor resolution and lens rather than zoom; see 384 vs 640 thermal. Frequently asked questions Quick facts: thermal monocular range Entry (160/256) detection ~250 m to 460 m Mid-range (384) detection ~650 m to 1,600 m High-end (640) detection ~1,650 m to 2,600 m Identification range Roughly a third of detection Biggest range factors Sensor resolution and lens length Weather effect Heavy rain and fog cut range

thermal or night vision for hunting
Blogs

Thermal vs Night Vision

Thermal vs Night Vision: Which One Do You Actually Need? (2026) Thermal imaging detects heat. Night vision amplifies light. That one difference decides everything: thermal finds game in total darkness, and night vision gives you a more detailed, natural image when there is some light to work with. If you remember one thing about thermal vs night vision, remember that thermal is the better tool for finding an animal and night vision is the better tool for identifying it. But that headline hides a lot you need to know before spending money. Which is actually better for hunting? Do you need both? Why is night vision green? Do thermal monoculars need an infrared illuminator? What does each cost? This guide answers all your questions in plain language, from a retailer that sells both and has no reason to push one over the other. We stock every major make of thermal and night vision, so unlike the manufacturer pages you will compare this against, the advice here is about what fits the way you hunt, not what we happen to build. Thermal vs night vision: the short answer Short on time? Here is the whole comparison in one box. Now the full picture. What is the difference between thermal and night vision? The difference comes down to what each device uses to build an image. Thermal reads the heat that warm bodies give off, so it needs no light at all. Night vision collects and amplifies the small amount of light already in a scene, so it needs at least some starlight, moonlight, or infrared light to work. That is why the two feel so different in the field. Point a thermal device into pitch black, and a warm animal glows instantly. Point night vision into the same black, and you see very little until an illuminator adds light. But once there is light, night vision shows you a detailed, lifelike scene that thermal simply cannot match. How thermal imaging works A thermal optic uses a sensor called a microbolometer that detects infrared radiation, the heat emitted by animals, people, and machinery, and turns tiny temperature differences into a picture. A warm boar stands out brightly against cool ground, even in pitch-dark fog or light cover. Thermal cannot be blinded by a bright lamp, and it works in daylight too. What it does not give you is fine visual detail, so it shows a clear heat shape rather than the exact markings of an animal. It also cannot see through glass or solid objects, only through gaps where heat escapes. How night vision works Traditional night vision uses an image intensifier tube that takes faint ambient light, multiplies it many thousands of times, and shows it on a small screen as a bright green or white image. The result looks natural and detailed, close to looking at the world through a dim window, which makes recognizing an animal or a precise aiming point easier. The catch is that it needs some light. On a truly dark, overcast night it relies on an infrared illuminator, and a bright light source can wash out or even permanently damage the tube. Thermal vs night vision: side-by-side comparison Feature Thermal imaging Night vision Source of image Heat (infrared radiation) Amplified ambient light Works in total darkness Yes, it needs no light. Needs some light or an IR illuminator Finds hidden or camouflaged game Excellent Limited Image detail for identification Heat shapes, less detail Natural and detailed Sees through light fog and smoke Yes. No Sees through glass No Yes. Spooks game No light emitted Some animals can see the IR illuminator. Daytime use Yes. No, bright light can damage tubes. Detects vs identifies Detection Identification Typical entry price From around €420 From around €2,000 for quality tubes Best role Finding the game fast Confirming the target Is night vision or thermal better for hunting? This is the question most hunters are really asking, and the honest answer is that thermal is better for finding game, while night vision is better for identifying it. Which matters more depends on how and what you hunt. Thermal is better when detection is the more difficult part. Thermal imaging reveals heat at night and through light brush, allowing you to spot boar, hogs, foxes, and coyotes that move in darkness and hide in cover, which you would otherwise walk straight past. You sweep a whole field in seconds, and you throw no light to spook a wary game. Night vision is better when identification is the hard part. If you need to read antlers, tell a fox from a cat, judge a precise aiming point, or move through terrain while reading branches and fences, night vision gives you the natural, detailed image that thermal cannot. For most night hunting, detection is the harder problem, which is why most hunters should buy thermal first. But the two are not really rivals. The most effective setups use both: scan and find with thermal, then confirm and shoot with night vision or a lit day optic. If you are choosing your first device, our thermal imaging camera for hunting guides and thermal monocular buying guide go deeper into the thermal side. When thermal wins Thermal wins whenever finding the animal is the hard part. It shows heat through darkness, light brush, long grass, and reeds, so a boar you would walk straight past appears as a bright shape on the screen. It lets you sweep a whole field in seconds, works in fog and drizzle, and throws no light to spook wary game. It also works in daylight, sees through smoke, and cannot be blinded by a headlight or lamp. For night hunting, where detection comes first, and for game recovery, where a downed animal stays warm, thermal is the stronger choice. Most hunters reach for a thermal monocular first for exactly this reason. When night vision wins Night vision wins when you need a natural, detailed image to identify or

thermal imaging camera for hunting
Blogs

Thermal Imaging for Hunting

Thermal Imaging Camera for Hunting: The Complete 2026 Buyer’s Guide A thermal imaging camera for hunting finds game by its body heat in total darkness, through light fog, and across open ground, with no ambient light at all. It is the fastest, most reliable way to detect animals at night, which is why a thermal imaging camera has become a standard kit for hog, coyote, fox, boar, and deer hunters across the US and Europe. But most buying guides come from a single brand that wants to sell you that brand. This guide is different. We sell every major make, so this guide tells you which thermal imaging camera for hunting actually fits the way you hunt, what the specs really mean, how far these devices truly see, what the law says where you hunt, and which models are worth your money in 2026. By the end, you’ll know what to look for, what to ignore, and which type and model to buy first. No fluff, no single-brand spin. Quick answer: what to buy Short on time? Here is the honest shortlist. Now the full guide. What is a thermal imaging camera for hunting? A thermal imaging camera detects infrared radiation, the heat every warm body gives off, and turns it into a visible picture. It does not amplify light the way night vision does, so it needs no moon, no stars, and no torch. A warm animal glows against cooler ground, even in total dark. Inside every thermal imaging camera for hunting is an uncooled sensor called a microbolometer. It reads tiny temperature differences across the scene and paints them as an image, with hotter objects shown brighter or in a warm color. Because the picture comes from heat and not light, a thermal camera works as well at midnight as at midday, sees through smoke and light fog, and cannot be blinded by a bright lamp. One limit matters up front: thermal shows you heat shapes, not fine detail. It is brilliant for finding an animal but weaker for studying antlers, coat markings, or a precise aiming point at distance. That is why many hunters pair a thermal imaging camera with night vision or a day scope, which we cover below. Curious about the physics? See how thermal imaging works. Why hunters choose a thermal imaging camera over a lamp A thermal imaging camera gives you three things a lamp never can. You spot the game the eye would miss, because heat cuts through darkness and light cover. You stay hidden, because there is no white light to spook a wary boar, coyote, or fox. And you scan fast, sweeping a whole field in seconds to pick out what is warm and moving. That detection power is why thermal has largely replaced the lamp for night hunting. A coyote crossing a stubble field at 300 yards is invisible to your eye and obvious on thermal. A hog holding tight in a cedar break shows up as a bright shape that you would otherwise walk right past. Thermal imaging camera vs night vision for hunting Thermal detects heat, so it is the best tool for finding game. Night vision amplifies light, so it gives a more natural, detailed image for identifying and confirming a target. They solve different problems, and serious hunters often own both. The full breakdown is in thermal vs night vision, but here is the short version. Capability Thermal imaging camera Night vision Works in total darkness Yes, it needs no light. Needs some light or an IR illuminator Detects hidden or camouflaged game Excellent, reads heat through cover Limited, sees only what light reveals Image detail for identification Heat shapes, less fine detail Natural, detailed image Sees through light fog and smoke Yes. No Spooks game with IR No The IR illuminator can reveal your position. Daytime use Yes. No, bright light can damage tubes. Best role Detection, finding the game fast Identification, confirming the target Our view after years of selling both: if you buy one device first, buy a thermal imaging camera, because finding the animal is the most challenging part. Add night vision later if your hunting needs precise identification in the dark. Many hunters settle on the proven combination of scanning with thermal and confirming with night vision or a lit day optic. The specs that actually matter Five numbers decide how a thermal imaging camera for hunting performs: sensor resolution, thermal sensitivity, detection range, refresh rate, and lens. Get these specs right for your quarry and terrain, and the rest is just detail. Sensor resolution (256 vs 384 vs 640) Resolution is the pixel count of the thermal sensor, and it is the biggest single driver of image quality and how far out you can identify the game. Common sizes are 256×192, 384×288, and 640×512. More pixels pack more detail into the image, so you can not only detect warmth but also start to tell what it is. For most hunting, 384×288 is the sweet spot. A 640×512 sensor has roughly three times the pixels and pulls detail from much further out, but it costs significantly more and only earns that cost on open ground at long range. The full comparison is in the 384 vs 640 thermal section. Thermal sensitivity (NETD) NETD measures the smallest temperature difference the sensor can detect, expressed in millikelvin, with lower values indicating better performance. A sub-20 mK sensor separates a warm animal from cool grass far more crisply than a 35 mK sensor, and the gap shows most on damp, mild nights when the temperature contrast is small. This number is the spec brochures bury and hunters underrate. Under 20 mK is the quality bar in 2026, and under 15 mK is elite. If you hunt in the wet US Southeast or wet European weather, NETD matters more than an extra hundred pixels. More on what NETD is. Detection range, and the DRI truth nobody tells you Here is the most important

Shopping Cart
Scroll to Top